I got this kit close to a year ago at the same time as the one below, as I don't have any experience with MDF kits I build the smaller one first & have to say it was a dream to put together.
Here's a link to both kits https://www.sarissa-precision.com/Boats___Launches/cat1603369_2504956.aspx
So full of confidence it was time to start the big one, well what could possible go wrong ?
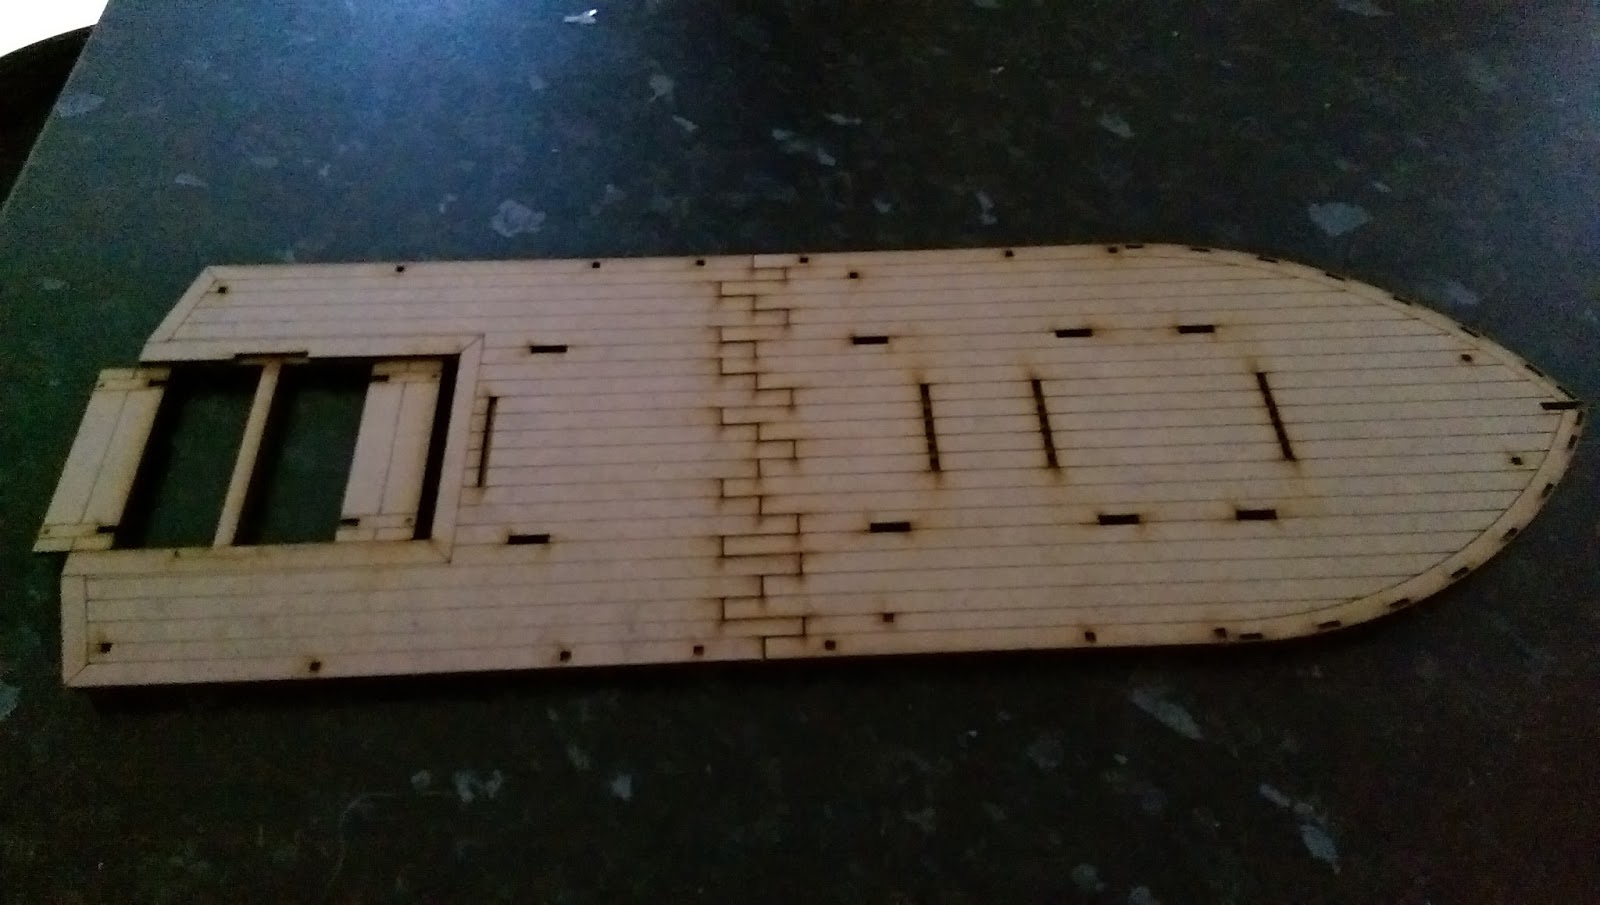
Well how about this, you might need to click on the pictures to enlarge them to see the problem, but the plans don't match up with the parts that make up the as you can see from the picture below :(
Not the start I was looking for,all the pieces in the picture above are in two parts, but if you look at the plan & the plan above then don't match, this then had me wonder which piece should go where.
When in doubt do a dry run, so happy that I'd worked out which way then went together I set about gluing them up.
Tip when doing this use the cabin parts to make sure there lining up correctly & be careful to try not get any glue into any of the little holes as that could cost you problems later.
With the base completed I laid a couple of heavy books on it & left it over night to set, make sure your doing this on a flat surface, you notice there a little notch at the very front of the boat were a part is meant to be glued in at this point, I've left it out & will explain later why.
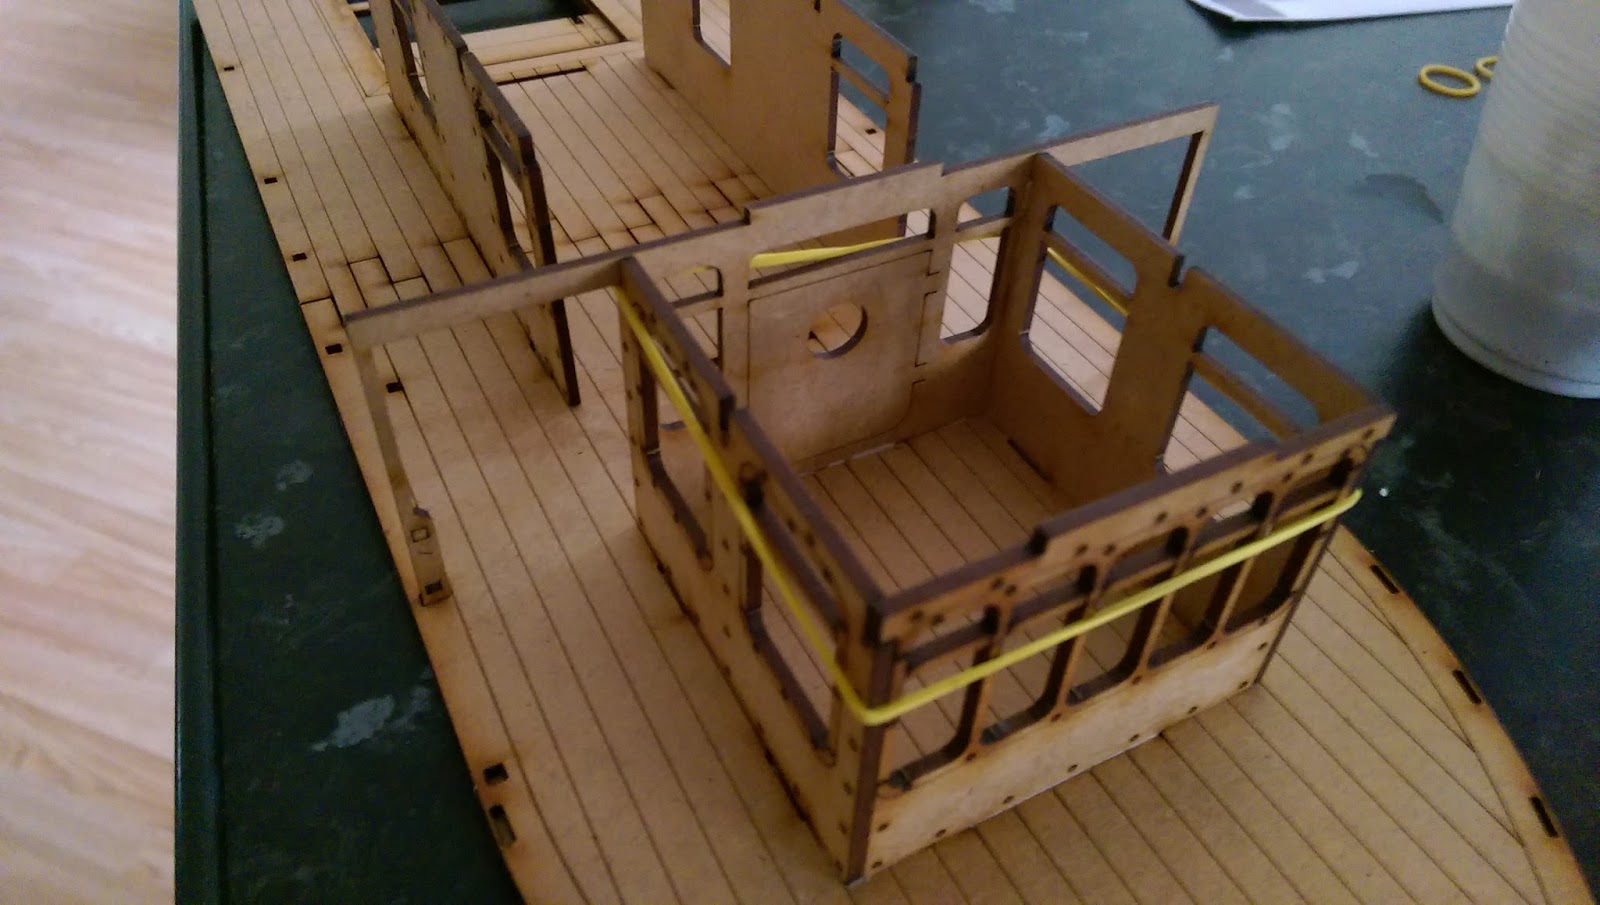
Tip while your waiting on the base to set you could if you wish start work on the upper part of the boat but I didn't, anyway time to carry on with making up the rooms, tip make sure to clean up any glue as you go, I find a wetwipe that used for clean around the house works well for this.
Rubber bands to hold the room together while the glue sets is useful, try to pick a band that is not to tight.
Tip as you can see in the picture above the back part carries out, so you'll need to put the rubber band on this piece before you put it in place, (see below) & cut it off later.
After the bad start I have to say that things where going nice & smoothly, the only grip would be that none of the parts are numbered.
With the main part of the lower section build it was time to start what I always think of as the fiddly bits, why is there always fiddly bits ? :)
Now its says to make these up, but if that means in place or make them up & then put them in place I couldn't say.
Anyway I made them up in place.
Next up was the wheel.
Then the handrails, tip slide the handrail in until it nearly in place then put a dab of glue on the two ends.
If you remember earlier I said there was a piece that was to be glue to the front, time now to look at that
Its a little part that goes in here & at the time I didn't think it was going in correctly, now if this was a mistake or something I did wrong I can't honestly say, so if anyone reads this that build this boat they might let me know in a comment.
I'd to do a little pairing on the slot on the front of the boat & cut the notch in the piece in the picture above to make it bigger, sadly I didn't think to take a picture before doing this to show you, but if you click on the picture above you might be able to see what it looked like on the plan.
Anyway this worked & I glued in the two card panels, this completed the lower section of the boat.
The upper section went together with no problems.
Tip before putting in the handrails put the roof part on (Don't glue it), there are two reasons for this one it will keep the up rights in the right place & it will make it easier to slid in the handrails.
Finial thoughts, a very nice model that went together very well after a dodgy start, with the only problem been the piece at the front, the only dislikes I have are the card funnel which I'll replace with a plastic one & from a gaming point of view that there is no stairs from the lower deck to the upper one, now for the fun part painting this thing :(
That's a rap for this post, as always my thanks for dropping in & if you care to leave a comment it would be welcomed :)


very pretty.
ReplyDeleteA steamboat is on the wish list at some point. Probably after a really wide river :)
Thanks Darra, here's a link for effective looking water that's easy to do mate :)
Deletehttp://web.archive.org/web/20080705040646/http://zeitcom.com/majgen/23watsc.html
The old Major General's site was/is great for Colonial/Pulp game/terrain ideas!
ReplyDeleteExcellent steamboats! Nice work.
Having watched many films, such as The African Queen, in which similar crafts were featured it's always been in the back of my mind to build a mini one, too. Maybe some day. Although, I haven't found a need for one (so far). Then again, "if you build it they will come". ha ha
Thanks Fitz, yes that site is indeed very useful.
DeleteI think the smaller one would do very nicely for the African Queen & like you said if you build it they will come & then it will be party time, yes I also like Wayne's World mate :)
This comment has been removed by the author.
ReplyDeleteNiiice!
ReplyDeleteI've had my eyes on this steamboat for a while and this post certainly didn't help... :-)
It's just prefect for pulp games.
I look forward to see how you paint it.
Thanks Joakim, what was it you said the other day ? something about following blogs been expensive :)
DeleteIt is a nice kit & could be used in lots of setting.
Yeah, I'm looking pointedly at you!
Deletehahaha
With some luck I will just be satisfied with how you do yours and then forget about the whole thing :-)
Keep telling yourself that Joakim, keep telling yourself that, but you know you want one lol
DeleteI'll tell my wife it's all your fault
Delete(not that she will believe me...)
I made my saving throw vs Shiny this time :-)
:)
DeleteThat looks fantastic Frank! Though I will say I do not envy you the task you are going to have trying to paint it lol! Looks like quite a few places it's going to be difficult to get a brush to. Looking forward to seeing its screen debut :)
ReplyDeleteThanks Ivor, well you know my loving for painting :) yes some of the places will be fun to get to ok & I had thought of painting it before making it, something I didn't mention in the post is the top deck & the roof are removable so a small help :)
DeleteHi Frank
ReplyDeleteI was looking at the sarissa site yesterday and saw the small launch, thinking that looks good and also familiar. I now know why.
The big boat looks a bit of a beast to paint as others have said, but I'm sure you will make a good job of it.
Bye the way, why didn't you paint bits pre build. I know I would have been too excited to see the built boat but you seem a bit more sensible than me.
Thanks John, as I'm not very use to MDF kits mate I was't sure if painting it first would cause problems with the build.
DeleteMy painting of it will be the same as everything else I paint, no masterpiece just good enough to look ok :)
I've only bought and made some MDF carts so I've no experience of the stuff but I understand why painting might cause problems and certainly something to think about.
DeleteIs it painted yet, I'm expecting to see it in your next game. ;-)
Yep pre-painting can lead to swelling & make it hard for the parts to slot together John, that's the carpenter in me talking, as for it been painted yet & appearing in the next movie, all I can say is your a hard taskmaster mate :)
DeleteGreat boat, and thanks for the detail on problems in the instructions. Can't wait to see it in action.
ReplyDeleteThanks Will, I don't often do this kind of post but found it enjoyable & might be useful if anyone else is building one, as for seen it in action your not the only one :)
DeleteThis comment has been removed by the author.
ReplyDeleteHow hard would it be to cut off the last two roof sections behind the smoke stack but leave the framework and add a canvas cover that can be rolled up to gain easy access to the open section on the back deck..I plan on doing that when I get mine, (pre-assembly) so I can add a small deck gun, also which room would have the steam engine and boiler in it? the one on the top deck by the stack or the larger one below?
ReplyDelete