I've done a lot of stuff since I started Tricol but haven't done to many how to's, which is bad on my behalf as if you dear reader are going to go to the effort of coming here then the least I can do is if I make something is to show you how I did it, then if it something you like you can go & try it yourself.
So today I've mud hut's for you, as I push on with the pulp alley perilous island campaign I know that the beastmen natives are going to need a place to live & I thought to myself what better then some mud huts, as after all in every pulp setting their are natives of some kind or another & there's always plenty of mud right ?
 |
| For the hut I used a paper plant cup these are ideal as their already textured |
 |
| Make a base I used some cork for mine & done it so that the hut will sit on it but you could do it with the base inside it |
 |
| I then cut about 20mm off the bottom of the cup, you could cut a bit more off if you wanted or nothing at all. |
 |
| using pre-mixed tile adhesive I put it on the bottom of the cup |
 |
| & stuck the cup to the base |
 |
| I then covered the surface of the base with the adhesive |
 |
| When the adhesive was dry i painted the base GW ushabti bone & the hut rhinox hide |
 |
| I then dry-brushed the hut with a mix of 2 parts bone & 1part hide |
 |
| this was followed buy a couple of dry bush coats of the bone |
 |
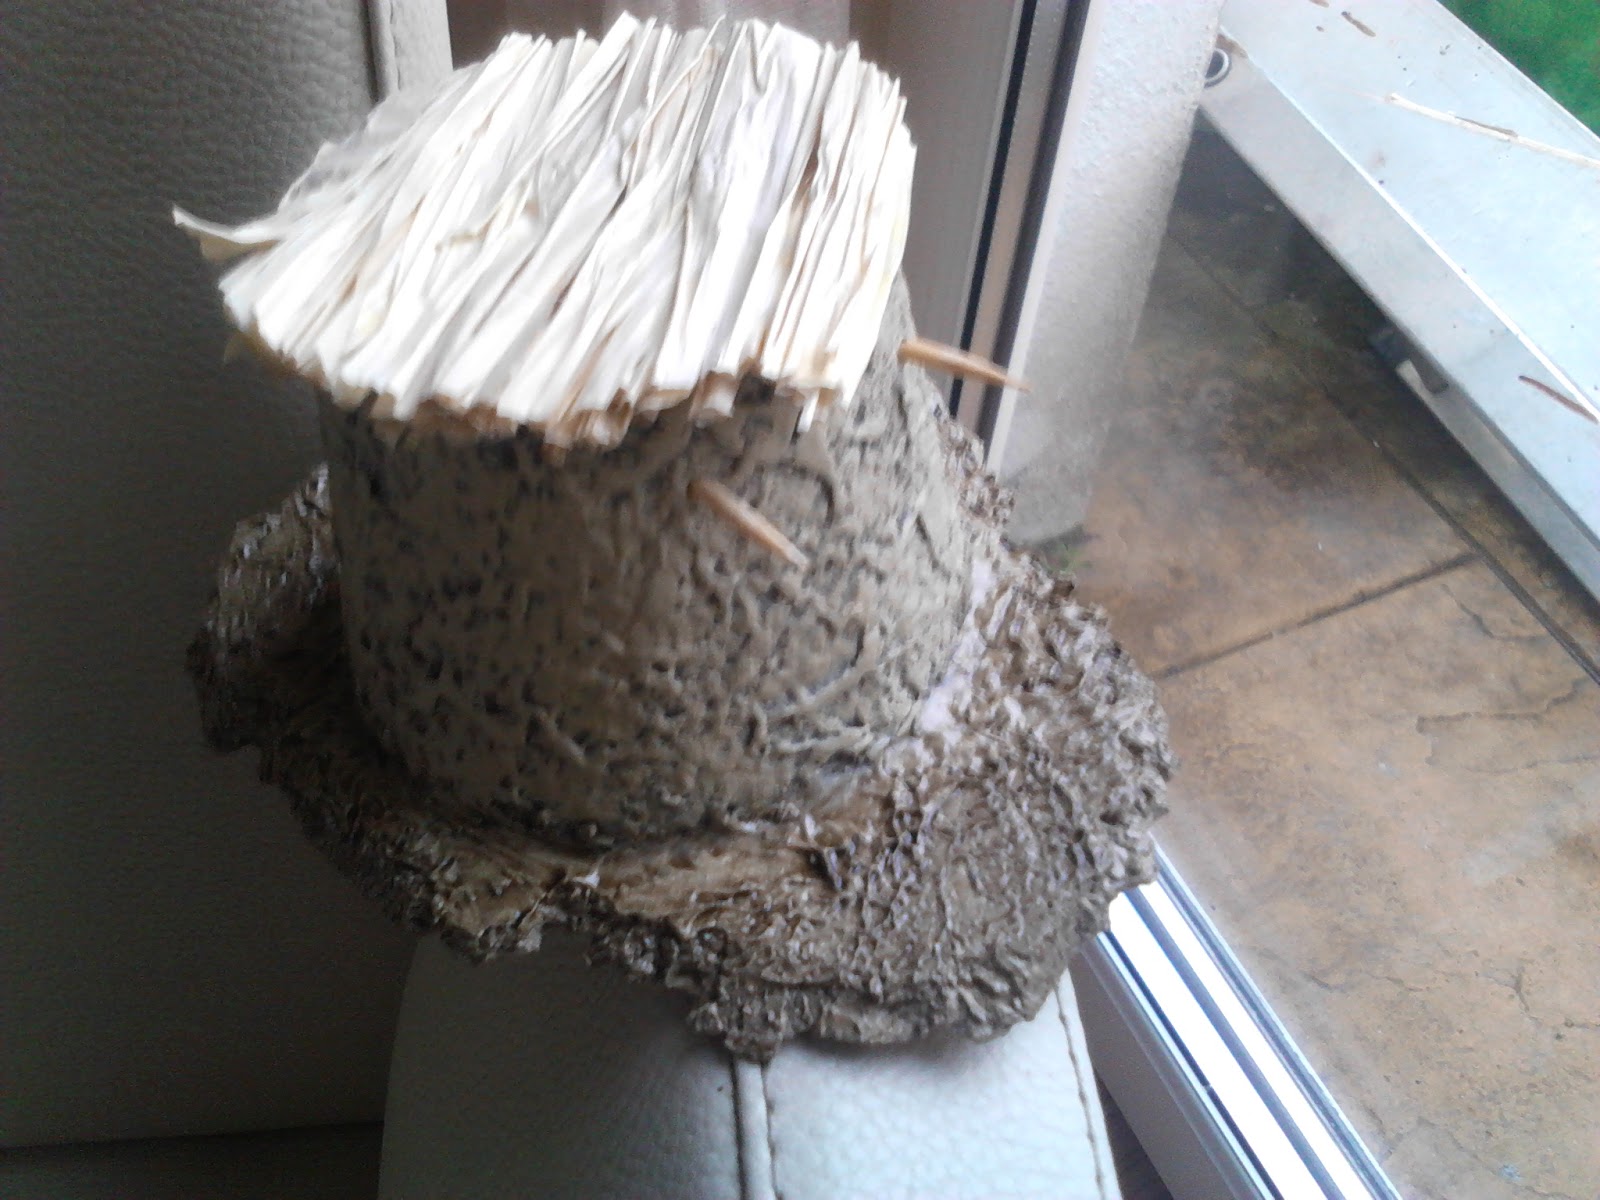
| The base got a coat of dark tone quickshade & when that was dry I started putting the straw on for the roof, I use wood glue to fix the straw on |
 |
| when doing the straw leave it long & you can trim it off when the glue sets |
 |
| Make two little holes with a tooth-pick about 30mm apart at the hight you want the door cover to hang from, brake the pick in half & glue it in place leave them long for now |
 |
| For the door cover I used a wetwipe you know the things that people use these days to clean the likes of counter tops & tables around the house, you'll have to leave it to dry for a few hours as they come moist |
 |
| I spayed the sheet red when it had dried & when that was dry cut a piece the size i wanted & painted a few dark green strips, but what ever the colour is is up to yourself |
 |
| You next need to glue the cover to a tooth-pick make sure it long enough to go right around the pick & then glue the pick to the two sticking out of the wall |
 |
| Trim off the picks & if you want add a little smoke coming from the roof |
 |
| I gave the roof & the bottom of the hut a wash of GW agrax earthshade I also did around where the picks go into the walls & the picks themselves & that it, a little mud hut that's cheap & easy to make |
 |
| The finished hut with two more that are at different stages, there's two reason I do them at different times, one is because I like to get one finished to see if it will work before putting to much effort into the others & two is you can be working on one when your waiting on something on the other to dry. |
I hope you found the post useful & if you'd like to comment it would be most welcome, well that's it for this post as ever my thanks for dropping in :-)


Looks great, Frank. Thanks for sharing the process.
ReplyDeleteThanks Mek & your welcome, it's like I said in the post I should be sharing this kind of stuff & who knows maybe if you put a corrugated tin roof on instead of straw some orks could live in them.
DeleteThat's such a great idea, thanks Frank. I have a mate who collects desert themed Orks who is going to have a field day with this :-)
ReplyDeleteThanks Marc, I hope your mate finds them good.
DeleteNot bad. I might borrow the idea for Congo when it comes out this year.
ReplyDeleteThanks mate & feel free to borrow way.
Delete